
原文鏈接https://my.oschina.net/microxdd/blog/919787
步驟:
1.上傳bootloader
ttl線接法
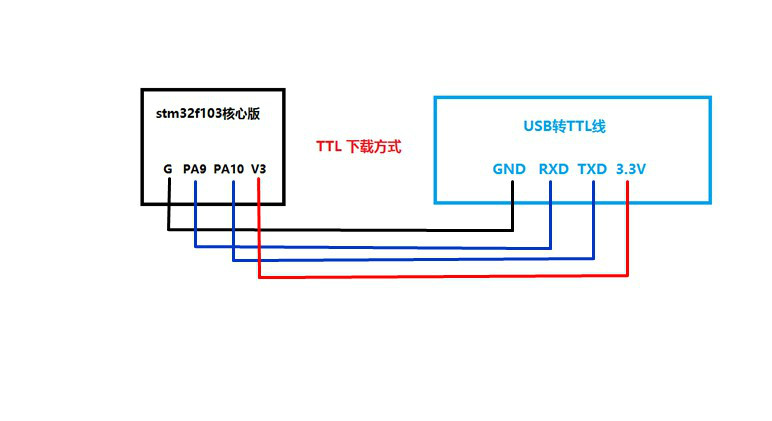
(圖片來自網絡)
generic_boot20_pc13.bin
http://pan.baidu.com/s/1eRWcK6Y
TTL線轉usb 連接電腦,記下串口號 下麵以COM3
cd 到generic_boot20_pc13.bin目錄
windows係統在Arduino_STM32-master\tools\win下麵可以找到stm32flash.exe
解除寫保護 stm32flash.exe -k COM3
stm32flash 0.4http://stm32flash.googlecode.com/Interface serial_posix: 57600 8E1Version : 0x22Option 1 : 0x00Option 2 : 0x00Device ID : 0x0410 (Medium-density)- RAM : 20KiB (512b reserved by bootloader)- Flash : 128KiB (sector size: 4x1024)- Option RAM : 16b- System RAM : 2KiBRead-UnProtecting flashDone.
刷入 stm32flash.exe -w generic_boot20_pc13.bin -v -g 0x0 COM3
如果提示,這就是因為沒有解除寫保護,重新執行stm32flash的兩步的操作
http://stm32flash.googlecode.com/Using Parser : Raw BINARYInterface serial_w32: 57600 8E1Version : 0x22Option 1 : 0x00Option 2 : 0x00Device ID : 0x0410 (Medium-density)- RAM : 20KiB (512b reserved by bootloader)- Flash : 128KiB (sector size: 4x1024)- Option RAM : 16b- System RAM : 2KiBWrite to memoryErasing memoryGot NACK from device on command 0x43Can't initiate chip erase!Failed to erase memory
2. 下載文件
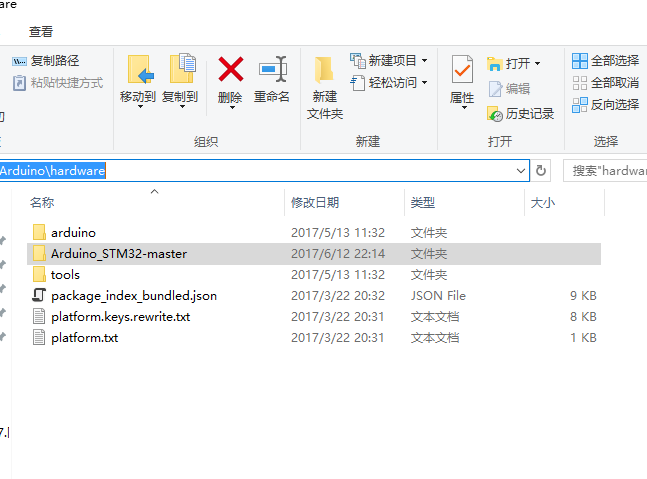
https://github.com/rogerclarkmelbourne/Arduino_STM32
放到arduino 安裝目錄的hardware目錄下
3. 下載arduino arm支持
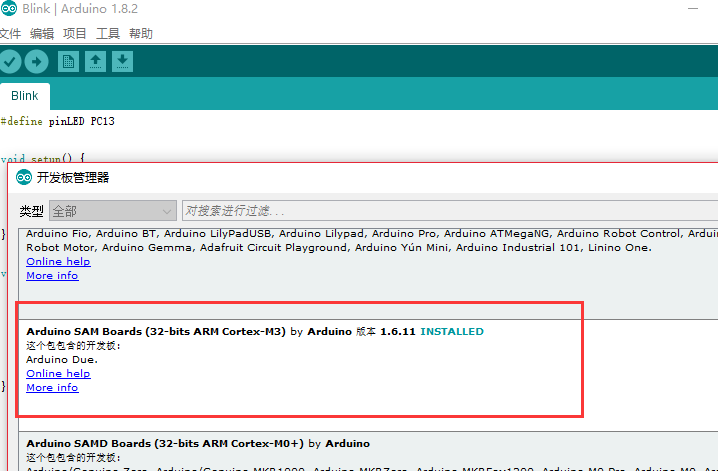
軟件設置

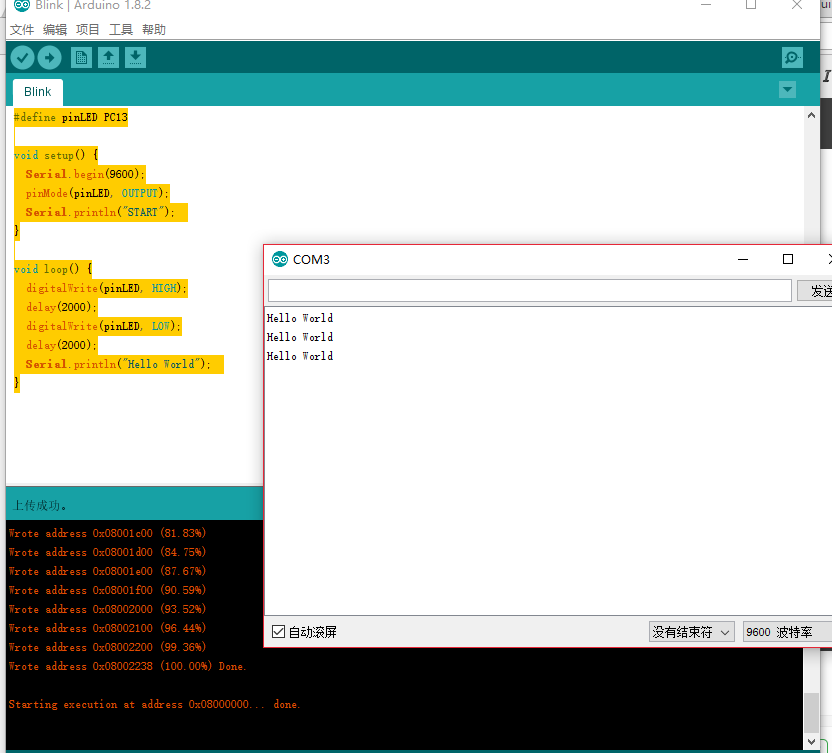
閃爍程序
#define pinLED PC13void setup() {
  Serial.begin(9600);
  pinMode(pinLED, OUTPUT);
  Serial.println("START");
}void loop() {
  digitalWrite(pinLED, HIGH);
  delay(2000);
  digitalWrite(pinLED, LOW);
  delay(2000);
  Serial.println("Hello World");
}
點擊上傳
如果出現了下麵提示,需要按一下核心板上的rest複位鍵
stm32flash 0.4Failed to init device.http://stm32flash.googlecode.com/Using Parser : Raw BINARYInterface serial_w32: 230400 8E1
在串口輸出中可以看到運行結果
資料下載
http://pan.baidu.com/s/1eRWcK6Y